Overview
Link to demo video: https://youtu.be/XlY2eoI5o-8
Part I of this project can be seen at https://github.com/krohitm/Twitter-Simulator
The part I of our project had all the functionalities working. In part II, we have used Phoenix web framework to implement a WebSocket interface to our part I implementation. This implementation was achieved by fulfilling the following tasks:
- Designed a JSON based API that represents all messages and their replies (including errors).
- Re-wrote our engine using Phoenix to implement the WebSocket interface.
- Re-wrote our client to use WebSockets.
We have used the exact same server that acts as an API to the Phoenix channels (check architecture section for details). This Server that acts as API can handle all the following:
- Tweeting to followers
- Searching tweets - tweets, tweets with hashtags, tweets with mentions
- Retweet a tweet that a user receives
We have broken down the implementation into two parts:
- A few simple clients, that when connected to localhost, make a socket connection to the server
- Simulator: A socket.js file that opens 1000 websocket connections to the server and does the job of simulating tweets, retweets and the various searches.
Simulator:
Simulator runs through the sockets in a loop. That does not mean that only one socket is occupied at a time. The server actors for tweets, retweets, search are constantly running in the background and pushing payloads to active sockets. Thus, our simulation is creating sockets which are constantly active, which is also what we are trying to achieve in our simulation.
The simulator opens 1000 websockets to the server, each as a new user. These users are then registered, and are given subscribers according to zipf distribution, as in part 1. After this, each of these users send tweets, search for tweets, search for hashtags, and search for mentions, choosing one of these behaviors, randomly. This cycle runs infinitely for each user/websocket.
Client Side:
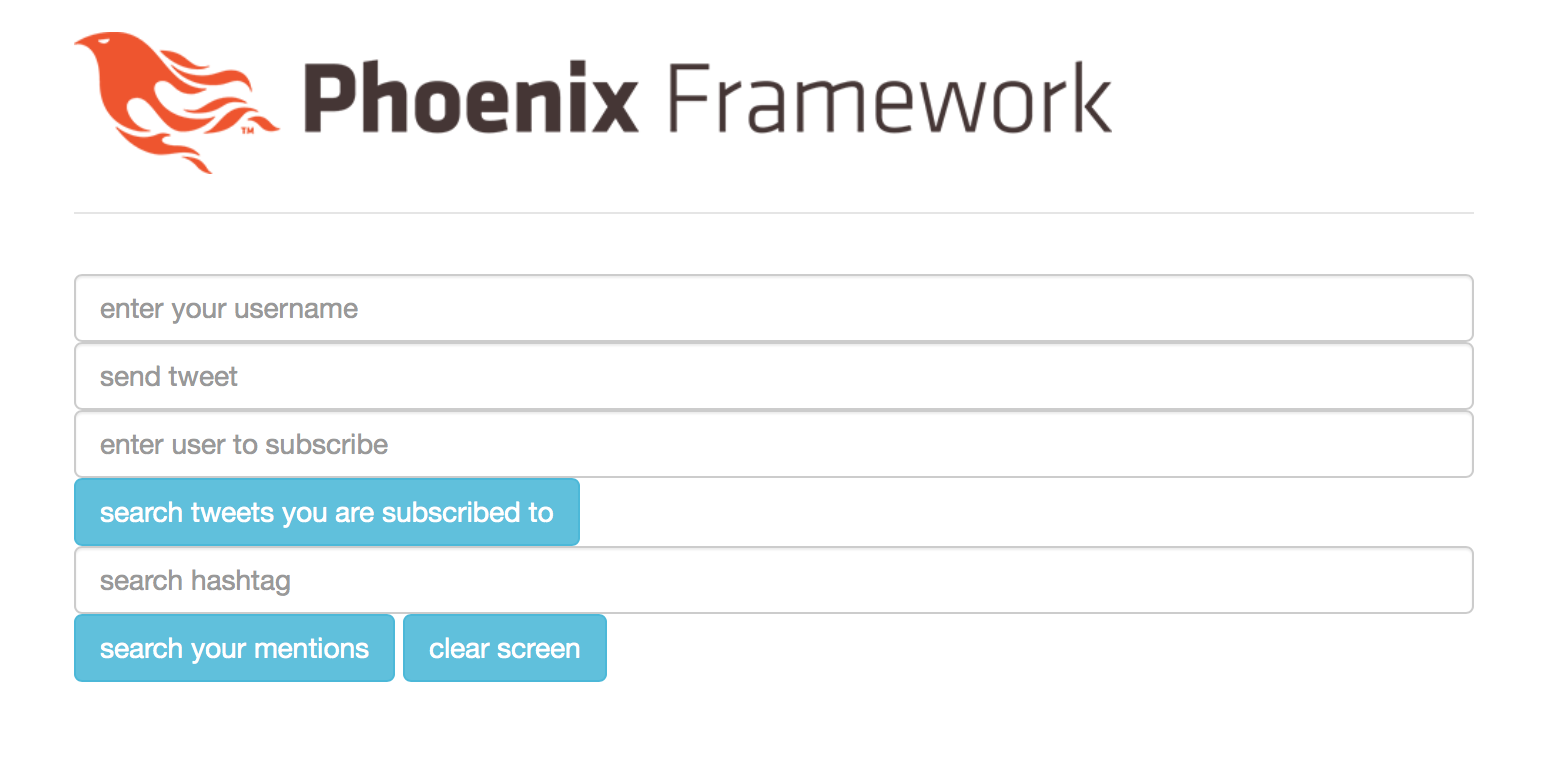
The server is accessed by running localhost:4000 in the browser. This leads to creation of a websocket, which is basically a new user in our case. A new user can give its username(a new one), subscribe to another user, send tweets, query for its mentions, search for hashtags, query for tweets of users it has subscribed to, and retweet the tweets it can see in its feed. These features can be seen in Fig. 1. An example of application of these features can be seen in Fig. 2.

Fig. 1: Features available to the user. The user can enter a new username, send tweets, subscribe to users, search for tweets of users subscribed to, search for hashtags, search for its mentions, and retweet a tweet in its feed

Fig.2: The new user has given its username as aditya and subscribed to user rohit. It receives tweets by user rohit (hello world!), can retweet, gets results for query for tweets of followed users, gets tweet when mentioned, gets search results for mentions, and gets search results for hashtags(#wow).
Running this project
Note: please hard reload web page or turn of browser Javascript caching for changes to be visible
Running Simulator:
- Go to assets > js > app.js
- At the bottom, comment the line import socket from “./single_socket” , and uncomment the line import socket from “./socket”. Continue if already so.
- Currently, 1000 websockets have been setup to run. To change the number of websockets, go to assets > js > socket.js. Go to line 13(let maxClients = 1000) and change the number to desired number of websockets. If you don’t want to change the number of websockets, skip this step.
- From terminal, run the command mix phx.server. Once the files have compiled, go to next step.
- Open a browser and run localhost:4000. This will start the given number of websockets.
Running Individual client:
- Go to assets > js >app.js
- At the bottom, comment the line import socket from “./socket” , and uncomment the line import socket from “./single_socket”. Continue if already so.
- From terminal, run the command mix phx.server. Once the files have compiled, go to next step.
- Open a browser and run localhost:4000. You can open multiple clients by opening multiple webpages for the given server.
- Once the webpage opens, give a username to the new user.
- If you have opened multiple clients and assigned usernames to them, you can ask a user to subscribe to some existing user by entering the username of that user in the enter user to subscribe box, and press enter.
- You can type a tweet in send tweet box, and press enter to send a tweet. You can mention existing users in these tweets, and any hashtags that you want.
- When you get a tweet in your feed, you can retweet it by clicking the button retweet under that tweet. The retweeted tweet can be seen in the feed of your followers.
- You can query for tweets of users you have subscribed to, by clicking the search tweets you are subscribed to button.
- You can query for your mentions by clicking the search your mentions button.
- You can search for hashtags by entering a hashtag, with the #symbol, in the search hashtag box, and press enter.
- You can clear the screen by clicking the clear screen button.
Performance with Web Sockets
We connected a maximum of 1000 sockets to the server. Additionally, we were also able to run our simulations on these sockets.
JSON Based API
This is not really needed since Phoenix does this for us implicitly. There are two kinds of communication: Client to Server: While sending this data, we make sure it is in the JSON format Server to Client: For Phoenix to send payload to client, we need to enclose it in a map, which is implicitly converted by Phoenix in a JSON object and sent to the client.